1 cup flour
4 eggs
⅔ cup milk
3 TBL vegetable oil, plus more for cooking them
While this might sound like a big production, in fact you can throw these together pretty quickly once you’ve done it a couple times. The entire process consists of these steps: make the filling(s), make the batter, cook the blintz wrappers, form the blintzes, cook them, eat them. I prefer to make the filling first so it will be ready to use when as soon as the wrappers are done. Family favorites are Oniony Potato Filling and Cheese Filling for Blintzes.
Mixing the Batter
The recipe as given here is best made in a blender, but if you scale up beyond the 4-egg version, you will have to work in batches, mix it with an immersion blender, or use another appliance to mix it.
Combine in the jar of blender
- 4 eggs
- ⅔ cup milk
- ⅔ cup water
- 3 TBL vegetable oil (Do not use olive oil or other strongly flavored oil)
Run blender to mix. Turn off, add
- 1 cup flour
and process again to mix, scraping the blender jar (when stopped) if any flour sticks to the side.
If you want to scale the recipe up or down, use these measurements. And yes, they are not exactly linear so pay attention to the chart.
| Eggs | 2 | 3 | 4 | 6 | 8 | 10 |
| Milk | ⅓ cup | ½ cup | ⅔ cup | 1 cup | 1½ cups | 2 cups |
| Water | ⅓ cup | ½ cup | ⅔ cup | 1 cup | 1½ cups | 1¾ cups |
| Oil | 1½ TBL | 2 TBL | 3 TBL | ¼ cup | scant ⅓ cup | scant ½ cup |
| Flour | ½ cup | ¾ cup | 1 cup | 1½ cups | 2¼ cups | 2¾ cups |
| Yield | 9 | 13 | 18 | 26 | 37 | 50 |
Cooking the Wrappers
To make the blintz wrapper, you need one or two skillets that have a flat bottom about 6 to 7 inches across. It’s better if the sides curve up to a wider width (like an omelette pan) or the sides are very low, like a round, small griddle. It’s harder with a pan with straight vertical sides, but it can work. Two skillets will make the work go faster, but one is fine if that’s all you have.
Heat the pan(s) but when you start working make sure they’re on a low heat. If the pan is too hot, the batter will bubble and the wrappers will develop holes. While the pans heat, spread out a clean dish towel on a counter near the range.
In a small bowl, pour
- 2 TBL vegetable oil (or margarine or butter)
With a folded paper towel, pick up a little oil and spread it liberally on the bottom of the skillet. It takes a little more than 2 TBL of batter to make each wrapper and you can easily measure this by using a half full ⅓-cup measure, but whatever works for you is fine. If you’re lucky, you have a ladle that’s just the right size.
Grab the skillet handle with your dominant hand, quickly pour the measured batter into the center and start to move the pan in a tilting circle to spread the batter out into an ever-widening circle until it reaches the edge of the flat area of the pan. If you reach the desired size and there’s still some batter you can keep circling to distribute the batter or pour the excess back the bowl/blender jar containing the unused batter. Set the pan back on the heat and wait for the wrapper to cook.
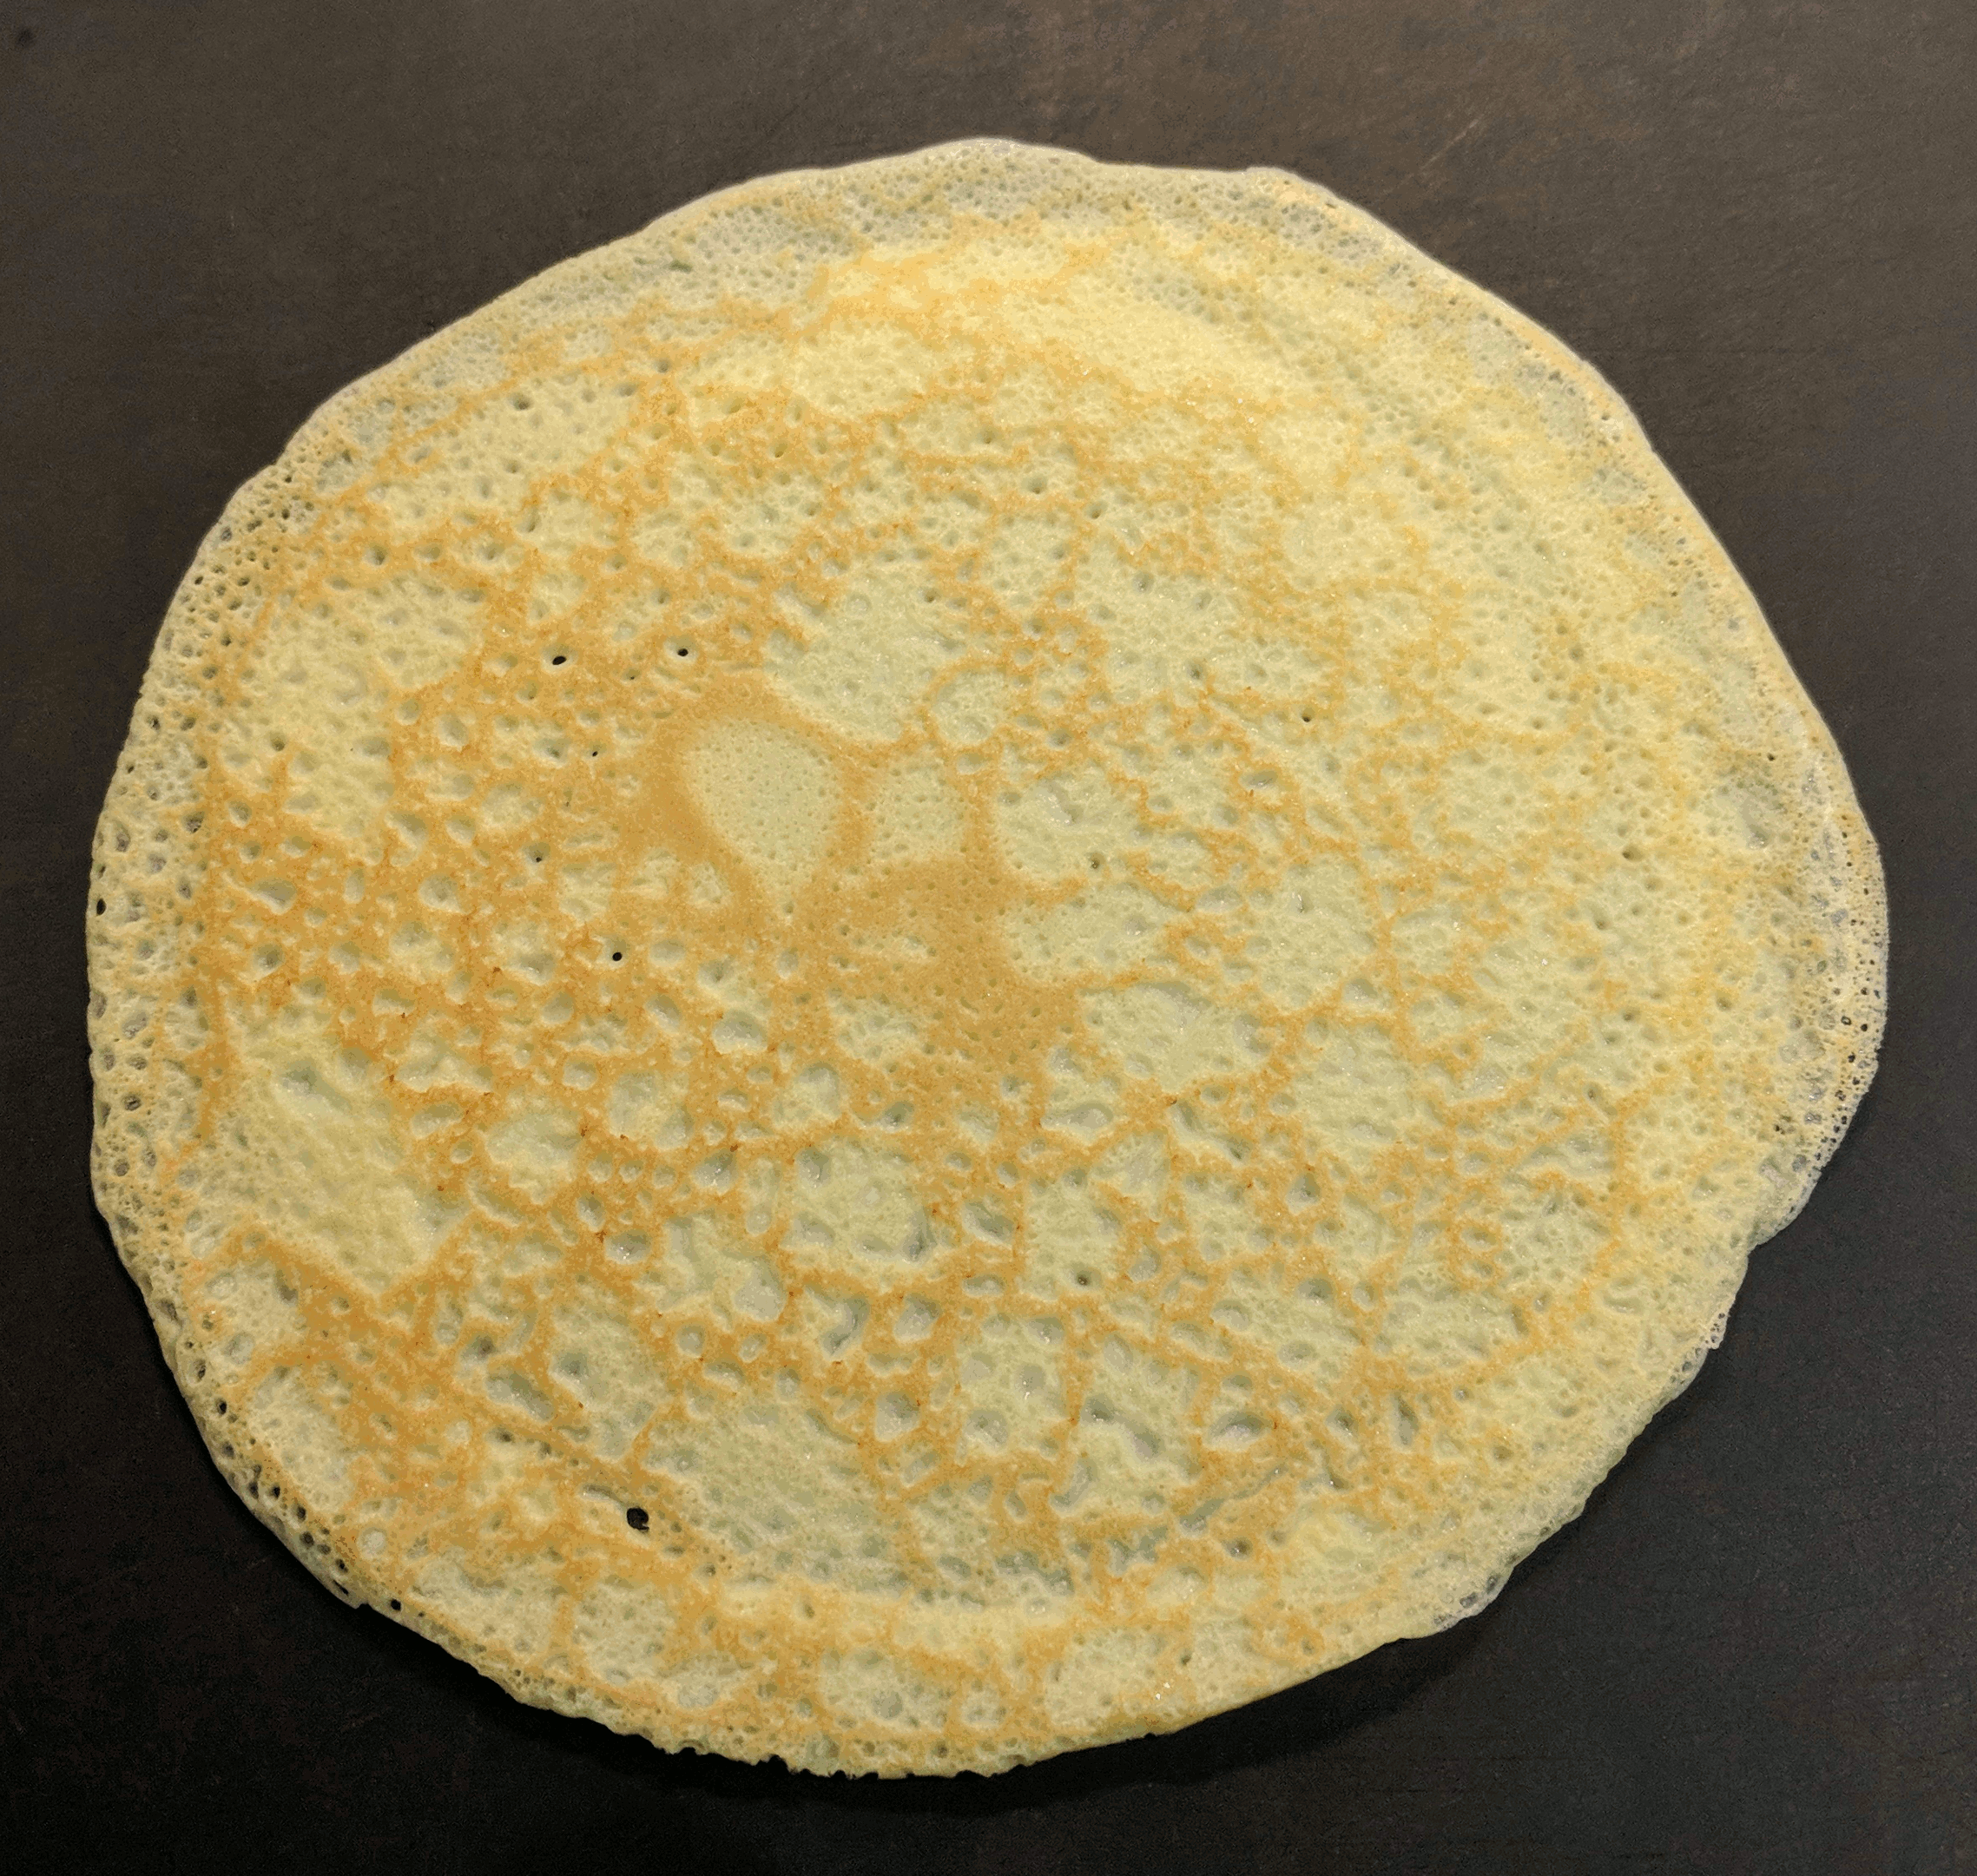
If there’s a hole or two, you can always use a spoon to drip a few drops of batter to fill in the problem area. If the wrapper is dotted with many small holes, it means the pan was too hot. Don’t despair, such wrappers work for more solid fillings like potato, but will be problematic for moist fillings like cheese and fruit.
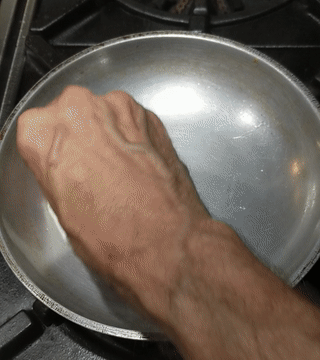
When it’s done cooking, the wrapper will have no wet areas on the surface. Run a butter knife around the edge of the wrapper to release it from the pan. Invert and knock the pan onto an empty spot on the towel. The wrapper should release easily and hopefully it has a bit of color to it. (If it doesn’t, just move on and let the next one cook a bit longer.) Return the pan to the burner immediately. Be sure to remove any attached crumbs from the pan and grease the pan before making the next wrapper.
As the wrappers are made, you can overlap cooled ones on the towel, but don’t put them right on top of each other completely as it will be hard to separate them.
If you want to make a lot of blintzes or delay the filling operation to, store the wrappers. To do so, tear a square of waxed paper and place it on a dinner plate. Place 3 wrappers offset enough that they barely extend past the edge of the plate and don’t overlap completely. Repeat layers of waxed paper and 3 wrappers until they are all stacked. Put the entire plate in a sealed plastic bag and refrigerate. Do not wait more than 24 hours to fill them as they tend to stick as they are somewhat moist.
Forming a Blintz
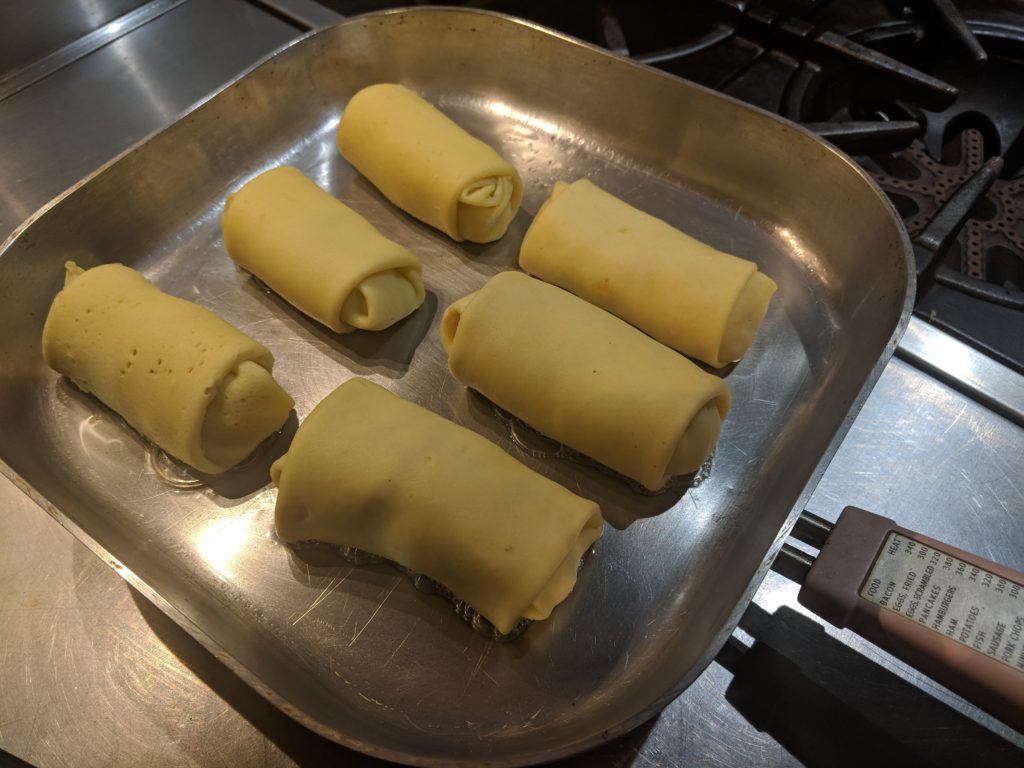
To roll up a blintz, follow these steps. Keep in mind that it’s a little easier to learn with a solid filling like potato rather than a looser filling like fruit or cheese.
- Put one wrapper in front of you on a flat dry surface. Be sure the browned side (the cooked side) is UP and the uncooked side is down. Re-read the last sentence!
- If the wrapper has uneven edges or holes on one side, put that area closest to you as it will wind up on the inside of the finished blintz.
- Put about 2 to 3 TBL of filling in an area about 1 by 3 inches crosswise, about 2 inches from the closest edge.
- Lift the edge closest the filling and fold it over the filling.
- Bring in the side edges making sure that as you do, it folds over the ends of the filling and that the longer edges are parallel or actually come in a bit. (If blintz gets wider as it rolls up, you will not be able to close the blintz completely: disaster awaits.)
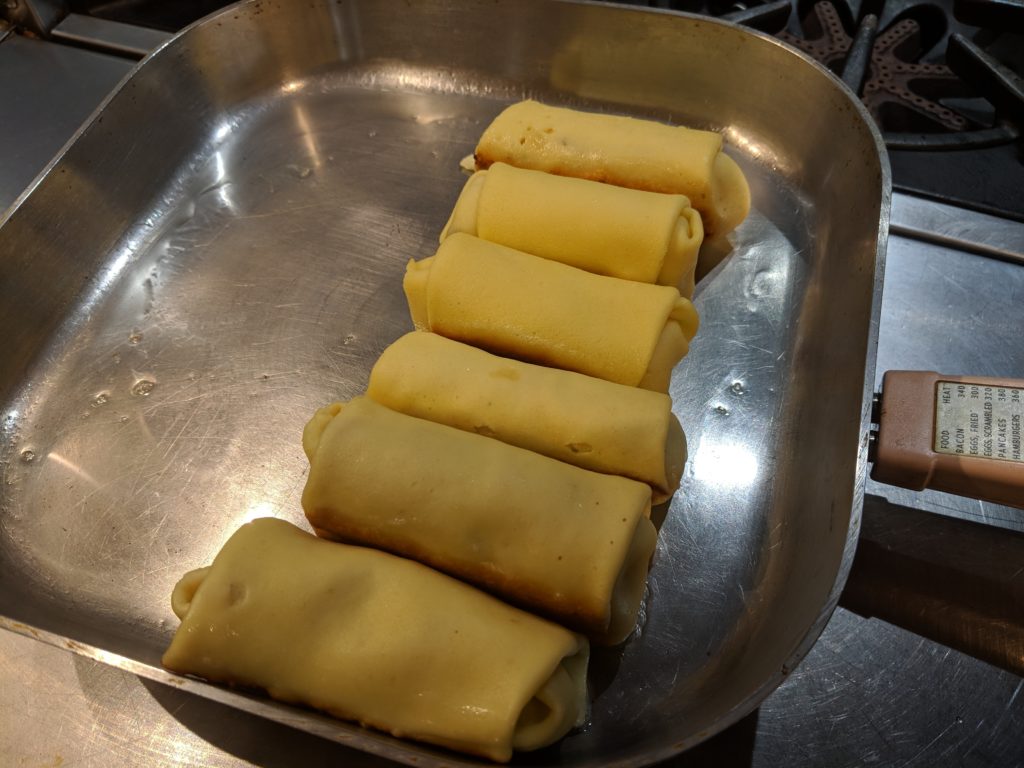
- Roll the entire assembly, gently and set it aside with the open edge down so it doesn’t try to unroll. If it tears as you roll, it means you tried to force too much filling into the blintz.
If you run out of space for the blintzes, stack them with waxed paper between layers and leave a little space between them if you can.
When you have formed all the blintzes, you have a couple choices. You can cook them immediately (see below), you can refrigerate them (wax paper between layers, space between the blintzes on each layer and stored sealed in the refrigerator for up to a couple days) or freeze them on wax paper-lined trays leaving space between each blintz. After they are completely frozen they can be transferred to bags (no wax paper needed). Frozen blintzes can be defrosted in the refrigerator before proceeding with cooking.
Cooking the Blintzes
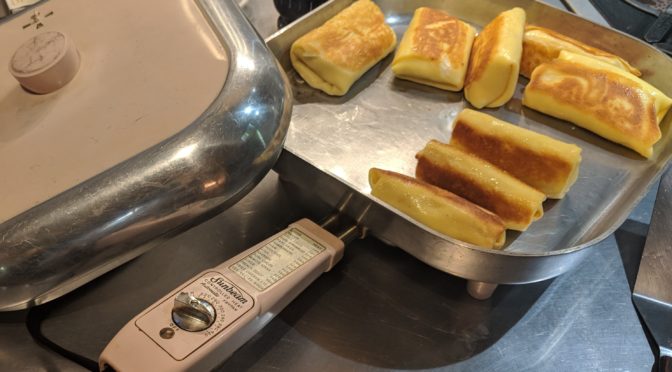
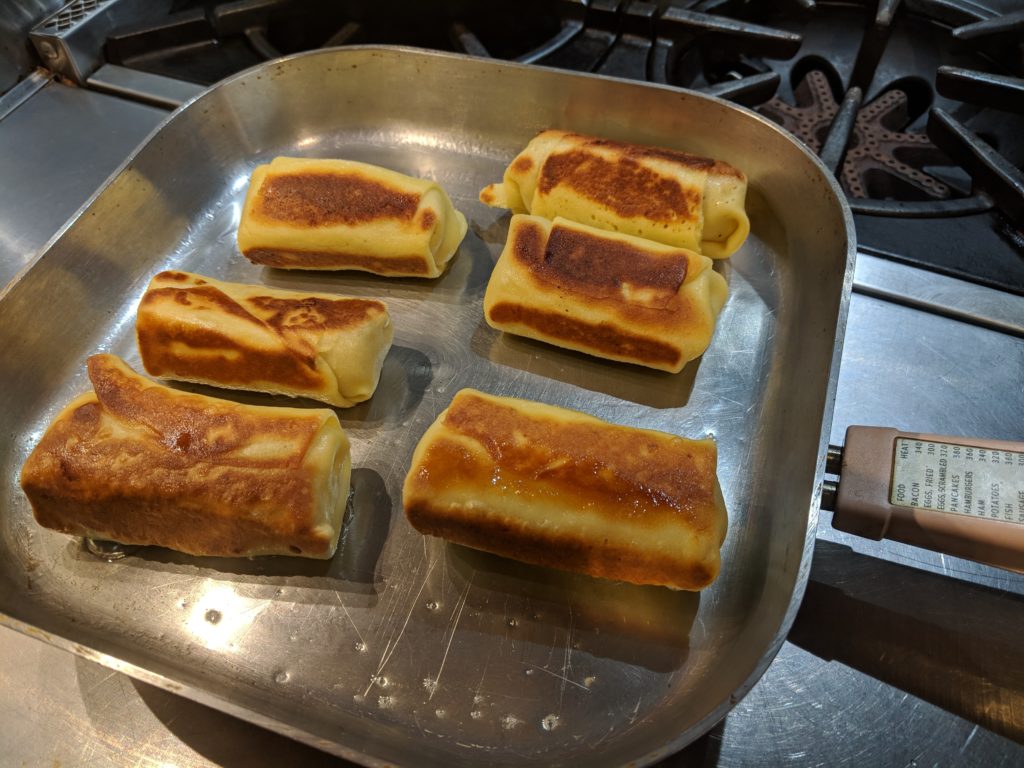
To fry the blintzes, obtain an electric frying pan with a pink handle. Yes, an electric frying pan set to 375º F is ideal for cooking these, but if you don’t have one, use frying pan(s) on the range, but once they heat up, keep an eye on the heat so the blintzes don’t brown too quickly or burn. Use vegetable oil (or margarine or butter) to grease the pan, then add the blintzes, leaving space between them. I try to cook them on 3 sides (the ends never get cooked), which means after the first side cooks I have to prop them up against one another (see photos). I think my mother just cooked them on two sides. Once they’re nicely golden all around, serve them.
I like to eat the onion or cheese ones with sour cream, but my mother served Blueberry Sauce on the side with the cheese blintzes. You can eat them plain if you like. And I encourage you to try coming up with your own fillings. (But do not attempt to serve me a jalapeño, blueberry or other modern bagel!!)